This feature is only available on FileZilla Pro, if you didn’t buy it yet you can buy FileZilla Pro from our Store.
Setting up Cloudflare R2 Connections
To connect to Cloudflare R2, make sure you have the following:
- A Cloudflare account ID – you can find it in the Cloudflare dashboard;
- An access key ID;
- A secret access key.
You get the access key ID and the secret access key when you create an API token in the Cloudflare dashboard.
Note: Differently from other S3-compatible storage providers, Cloudflare R2 does not require the setup of regions and endpoints. However, certain features like S3 File Properties and S3 Lifecycle Policies are not available due to R2 limitations. Additionally, support for S3 Canned ACL and S3 Storage Class features is limited.
Configuring FileZilla Pro to connect to Cloudflare R2
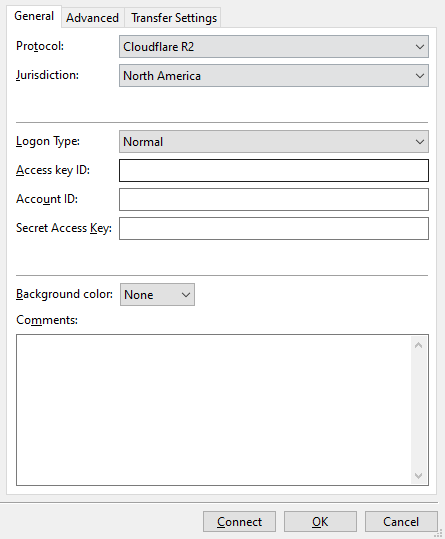
Configure FileZilla Pro to connect to Cloudflare R2 by following these steps:
- In the menu bar, click on File › Site Manager…. For more details on creating and managing sites, see Using the Site Manager for more details.
- Click on New Site.
- Select Cloudflare R2 from the Protocol drop-down list.
- Choose the jurisdiction from the Jurisdiction drop-down list. The available options are:
- North America
- European Union
- FedRAMP (Federal Risk and Authorization Management Program
- Enter the access key ID.
- Enter your account ID.
- Enter the secret access key.
- Click on Connect.
The available buckets will appear in the Remote directories section of the FileZilla Pro window.
The video tutorial below shows how to connect to Cloudflare R2 Cloud Storage with FileZilla Pro.
