Below you find a step by step guide, if you prefer you can watch our Configuring Amazon S3 Storage Class video tutorial.
Each S3 bucket and file has an associated storage class.
To configure FileZilla Pro to use a storage class when creating buckets and files:
- Connect to your S3 site.
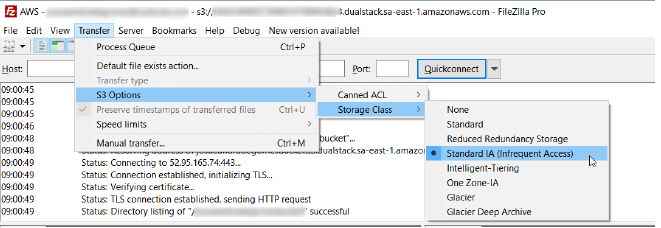
- In the main menu choose Transfer > S3 Options > Storage Class:
- None: no storage class is used. The S3 provider will use a default storage
class for the bucket or object. - Standard.
- Reduced Redundancy Storage.
- Standard IA (Infrequent Access).
- Intelligent-Tiering.
- One Zone-IA.
- Glacier Flexible Retrieval (formerly Glacier).
- Glacier Instant Retrieva.
- Glacier Deep Archive.
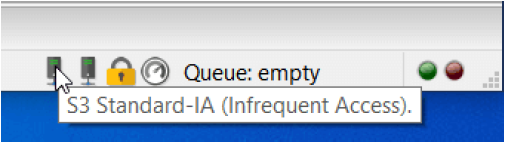
- The chosen storage class is shown in the status bar:
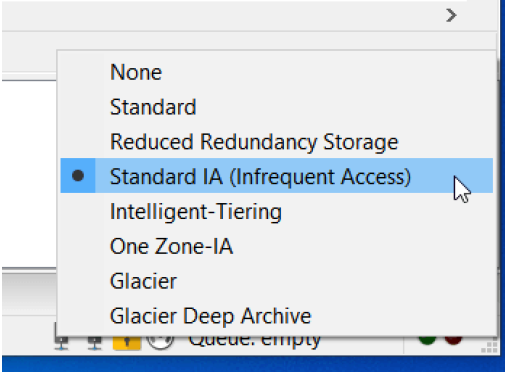
- Click the storage class status bar icon to select the storage class:
The options are:
Files added to the queue for upload include the currently selected storage class option
which will be set when the file is processed. Buckets created during the queue processing
use the currently selected storage class.
The video tutorial below shows how to connect to S3 Storage Class with FileZilla Pro.
Amazon S3 is just the start
FileZilla Pro connects to all major cloud storage providers from a single interface — no extra software, no credential juggling. Transfer files between your local machine and the cloud exactly as you would over FTP.