This feature is only available on FileZilla Pro, if you didn’t buy it yet you can buy FileZilla Pro from our Store.
Below you find a step by step guide, if you prefer you can watch our FileZilla Pro Connect to Amazon S3 Cloud Storage video tutorial.
Follow the next steps to configure FileZilla Pro to connect to Amazon S3:
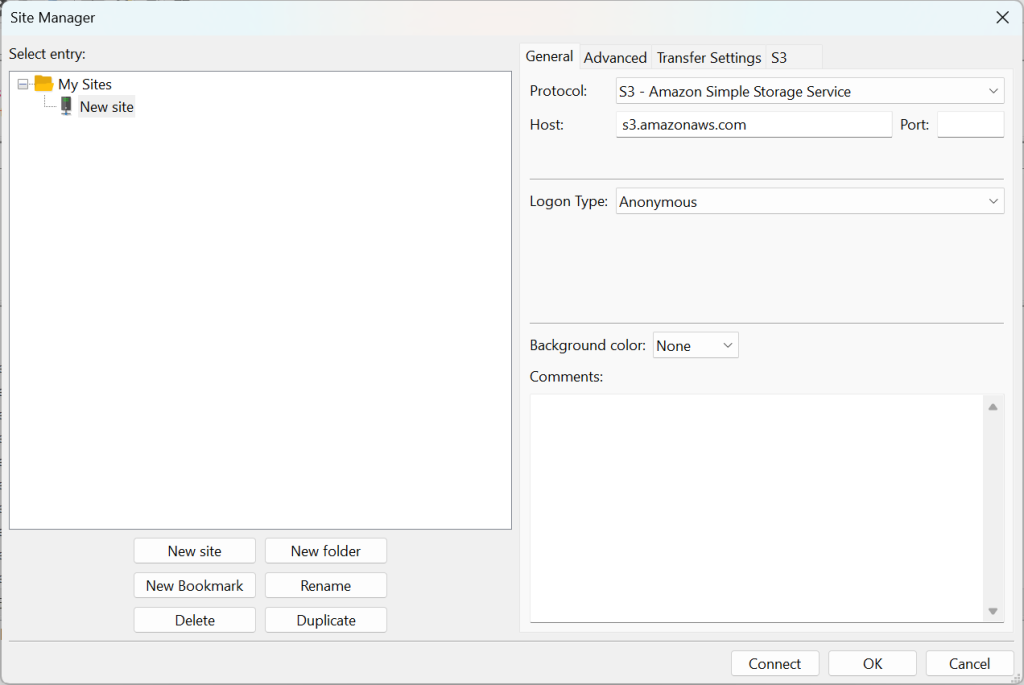
- In the menu bar, click on File › Site Manager….
For more details on creating and managing sites, see Using Site Manager. - Click on New Site.
- Select S3 – Amazon Simple Storage Service from the Protocol drop-down list.
- In the Host field, leave as it is. FileZilla Pro will connect to the default region endpoint. For a different region, use the Region field in the S3 tab.
- Leave port as-is.
- Enter the access key into the Access Key ID field in the Site Manager.
- Enter the secret access key into the Secret Access Key field in the Site Manager.
- Click on Connect.
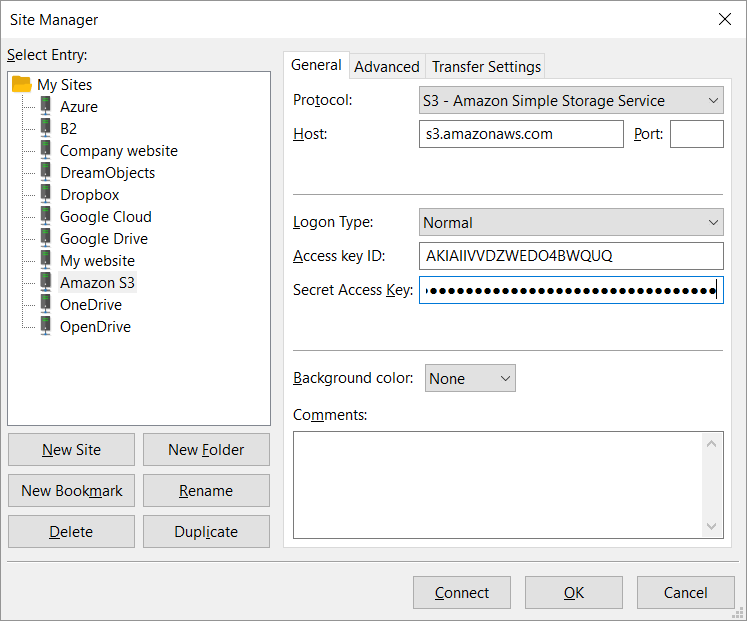
Your file storage buckets will be displayed in the Remote directories section of the FileZilla Pro window.
Note: Credentials that do not have permission to list available bucket need to directly specify the target bucket as default remote directory in the Advanced tab. See Listing a bucket.
By default, FileZilla Pro connects using the endpoint of the first configured region in Edit › Settings › Transfers › S3: Providers. To customize this default behavior, use the Region field within the S3 tab.
The video tutorial below shows how to connect to Amazon S3 with FileZilla Pro.
Video tutorial: FileZilla Pro Connect to Amazon S3 Cloud Storage
Related Topics: