FileZilla Pro Enterprise Server supports Second Factor Authentication (2FA), a two-step verification authentication service based on the Time-based One-time Password (TOTP) algorithm.
TOTP works by generating a unique numeric code that changes at regular intervals, typically every 30 seconds. This code is synchronized between the server and the user’s device. When logging in, the user enters the current code displayed on their device, which is verified by the server. FileZilla Pro Enterprise Server accepts 3 codes: immediately previous, current, and next. This accounts for time differences and entry delays. To verify the server time setting, check if your operating system is configured to “Synchronize with an Internet Time server”.
Below you find a step by step guide on how to set up 2FA with FileZilla Pro Enterprise server.
How to Set Up Two-Factor Authentication
- Go to the Administration Interface and select Configure from the server menu.
- Select a User in Rights management > Users.
- Select Second Factor Authentication (2FA) and then Use a time-based OTP.
2FA works with all types of credentials, but Do not require authentication.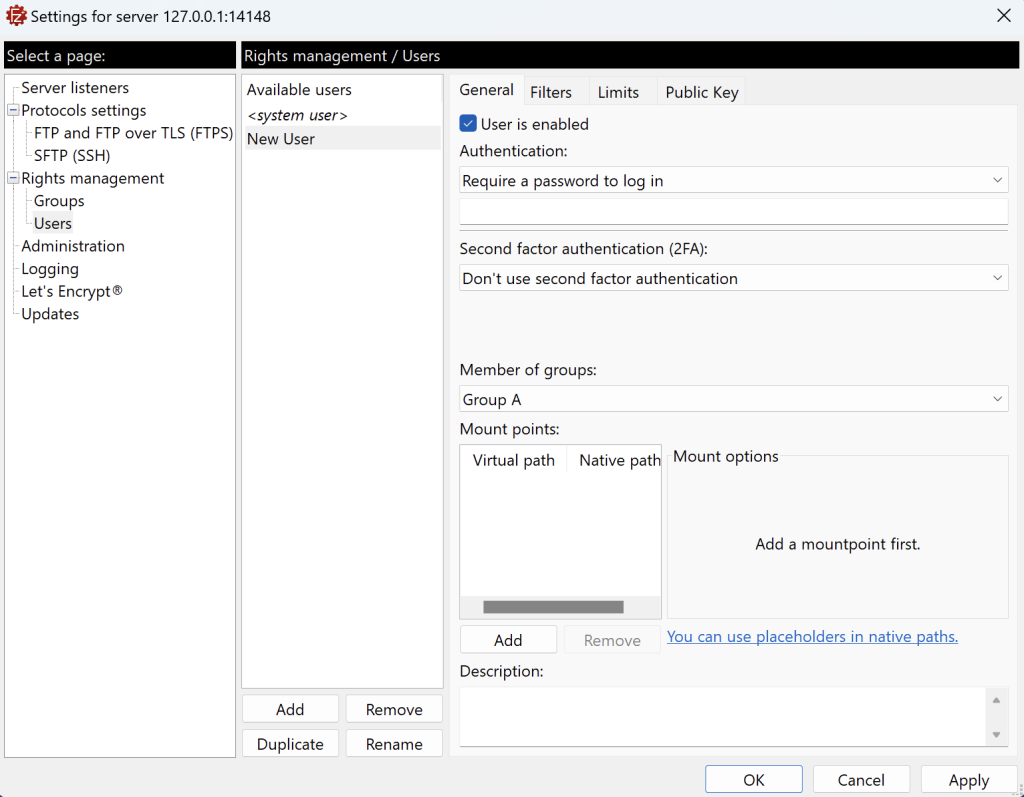
- Click on the Generate button to create a secret key.
- Communicate the Secret Code.
You will need to enter a secret code manually or let the server generate it for you. If you choose to have the server generate the secret code, a dialog box will pop up, and the code will be automatically copied into the clipboard.
Note: Alternatively you can enter a secret key yourself, note that it must be a valid string long at least 16 base32 characters (A–Z, followed by 2–7). If the secret key matches the criteria then the Copy to clipboard button becomes active.
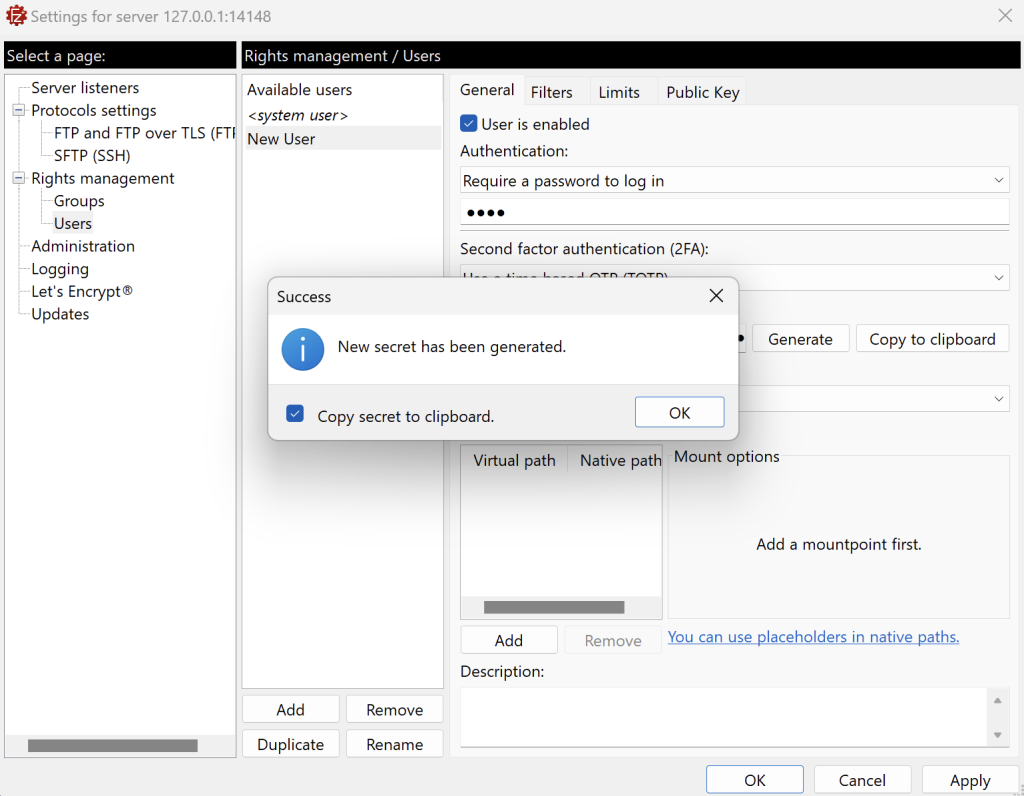
You need to communicate the secret code to the end-user using a secure channel. This is an important step to ensure the security of your connection.
The copy to clipboard function helps you to temporarily store the secret key so that you can paste it
somewhere to communicate it securely to the user.
The user will need to enter the secret key in their preferred TOTP-capable authenticator app, such as Google Authenticator where they need to click on the + button and then select Enter a setup key and enter it.
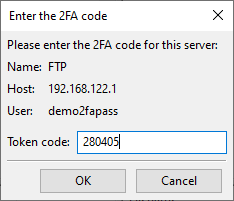
Users using either the FileZilla or FileZilla Pro client must first add a new entry in their time-based one-time password generator, such as Google Authenticator, by entering the provided secret code.
Just like for any other FTP or FTPS server, they need to enter the hostname, username, and password. FileZilla or FileZilla Pro will then prompt them for the one-time password generated by Google Authenticator.
Note: When connecting to an SFTP server, users must enter both the one-time password generated by Google Authenticator and the user’s password in the password field, separated by a semicolon. In the example below 215798 is the one-time password and 2WaPEx2D$dLvpc is the user’s password:
215798;2WaPEx2D$dLvpc
This approach applies to users not using FileZilla and FileZilla Pro when connecting to FTP and FTPS servers.
Related Topics: Second Factor Authentication (2FA)
The video tutorial below shows how to set up a second factor authentication with FileZilla Pro Enterprise Server.