Migrating a website to a new host means copying every file from the old server to the new one, then pointing your domain at the new host only after you’ve confirmed everything works. FileZilla Pro handles the file-transfer half of that job — connect to both hosts, download from the old one, upload to the new one, and verify nothing’s missing before cutover. It doesn’t touch your database or your DNS settings; those are separate steps covered below.
What “migrating a website” actually involves
A full migration usually has three independent pieces, and it’s worth being clear about which one this guide covers:
- Files — your site’s code, themes, plugins, uploaded media, and configuration files like
.htaccess. This is what FileZilla Pro moves. - Database — if your site runs on WordPress or anything else backed by MySQL/MariaDB, the database is separate from the files and needs its own export/import, typically through phpMyAdmin or whatever database tool your new host provides.
- DNS — pointing your domain at the new host’s server, which you only do once you’ve confirmed the new copy actually works.
Skipping straight to DNS before testing the new copy is the single most common way a migration turns into downtime. The steps below are ordered to avoid that.
Set up both hosts in FileZilla Pro
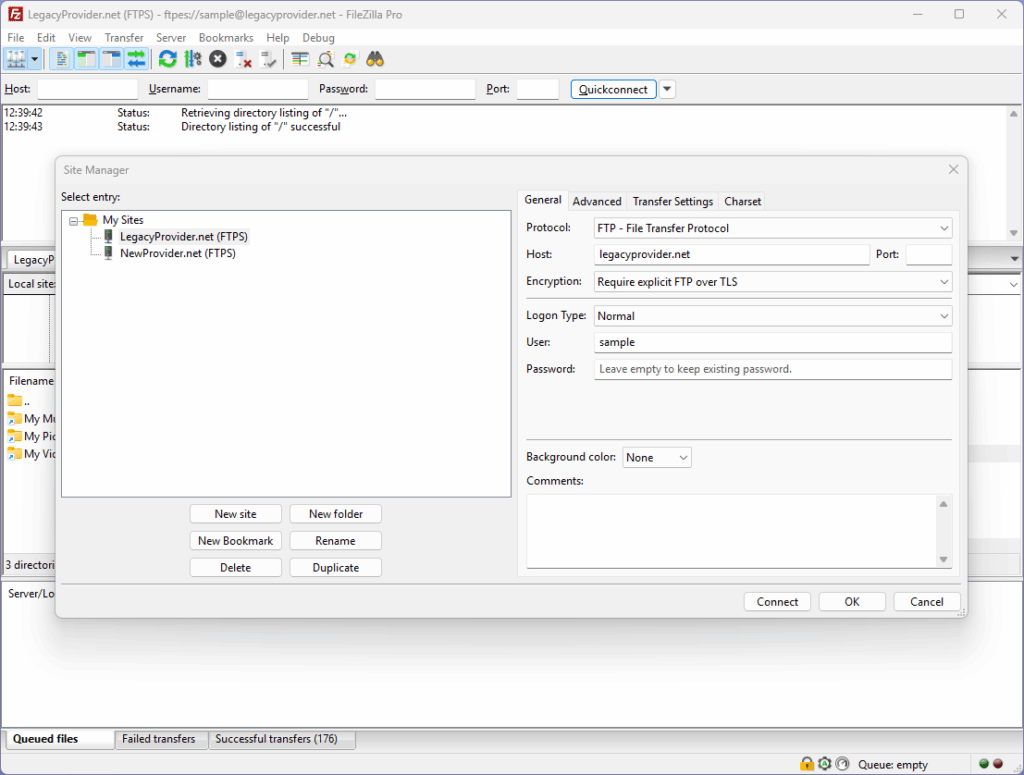
Both your old and new hosting accounts are just Site Manager entries, connected to at the same time:
- Open Site Manager and create an entry for your current host, using the FTP/SFTP credentials your existing hosting provider gave you.
- Create a second entry for your new host, using the credentials from your new hosting provider.
- Connect to both. Each opens in its own tab, so the old and new server are one click apart instead of needing two separate FTP sessions.
Copy everything from the old host
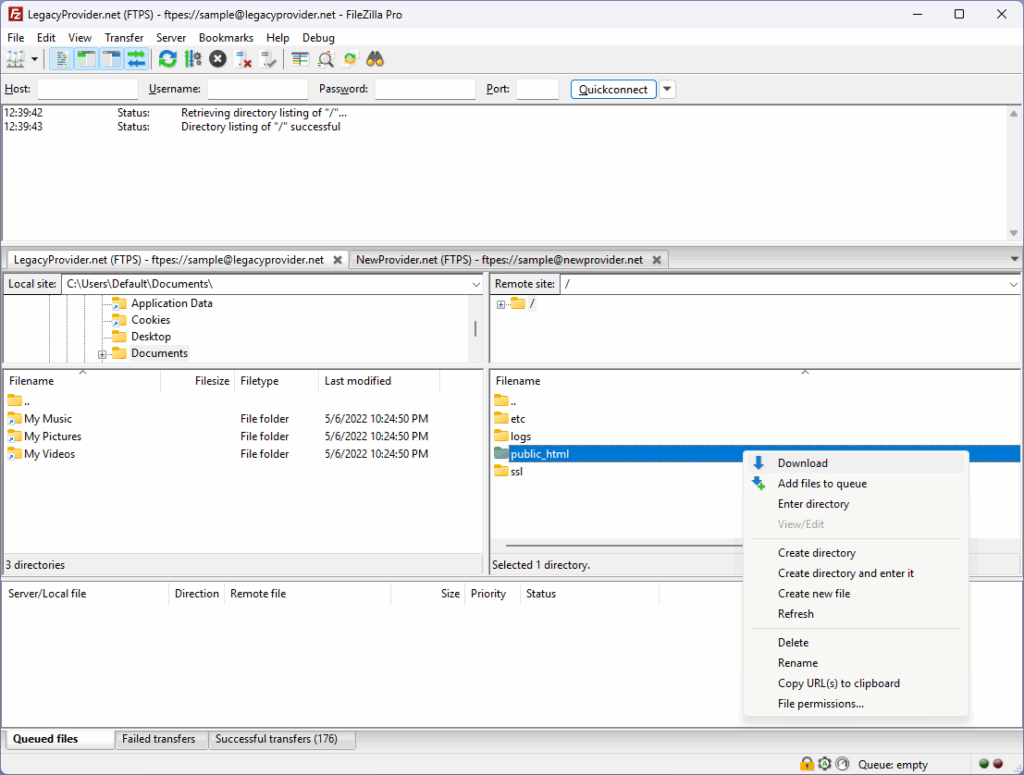
Connect to the old host and download the entire site directory to your local machine — not just the folders you remember, the whole root of your site, including files that start with a dot. FileZilla Pro transfers dotfiles like .htaccess by default (there’s a “Treat dotfiles as ASCII files” option under Edit > Settings > Transfers > FTP: File Types if you want them handled as text rather than binary), so a full download won’t silently skip your redirect rules or server configuration.
Upload to the new host and verify nothing’s missing
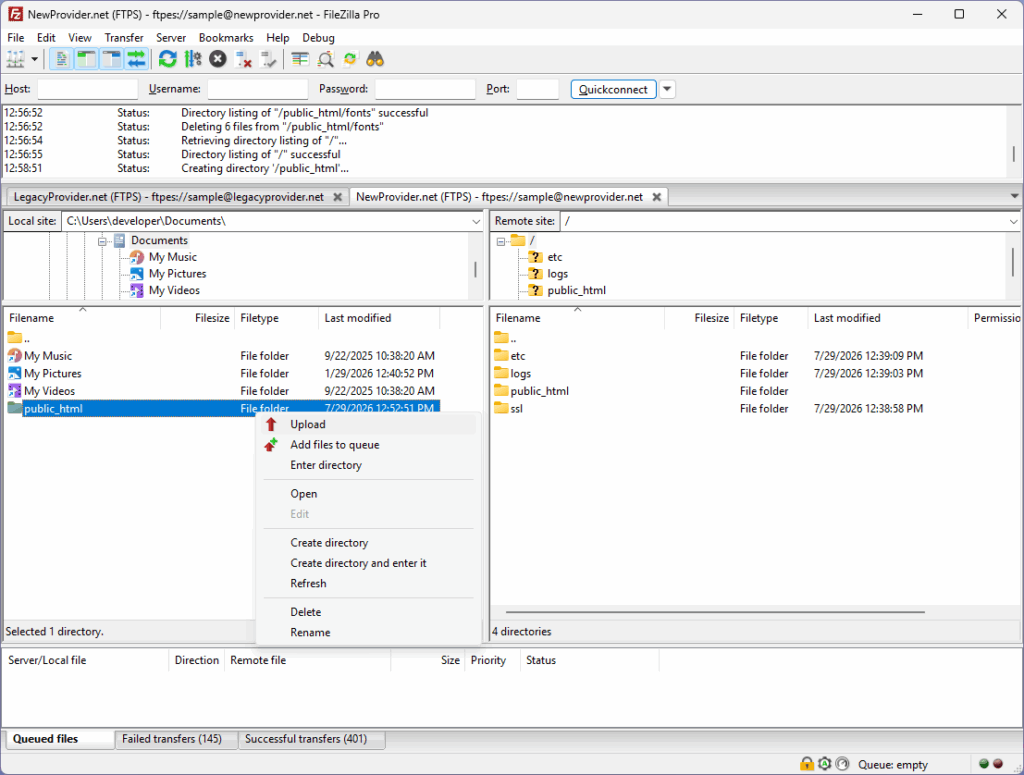
Switch to the new host’s tab and upload the full local copy, keeping the same folder structure your old host used (check with your new provider whether your site should live in the account’s root or a specific subfolder). Right-click the local folder and choose Upload to send everything at once:
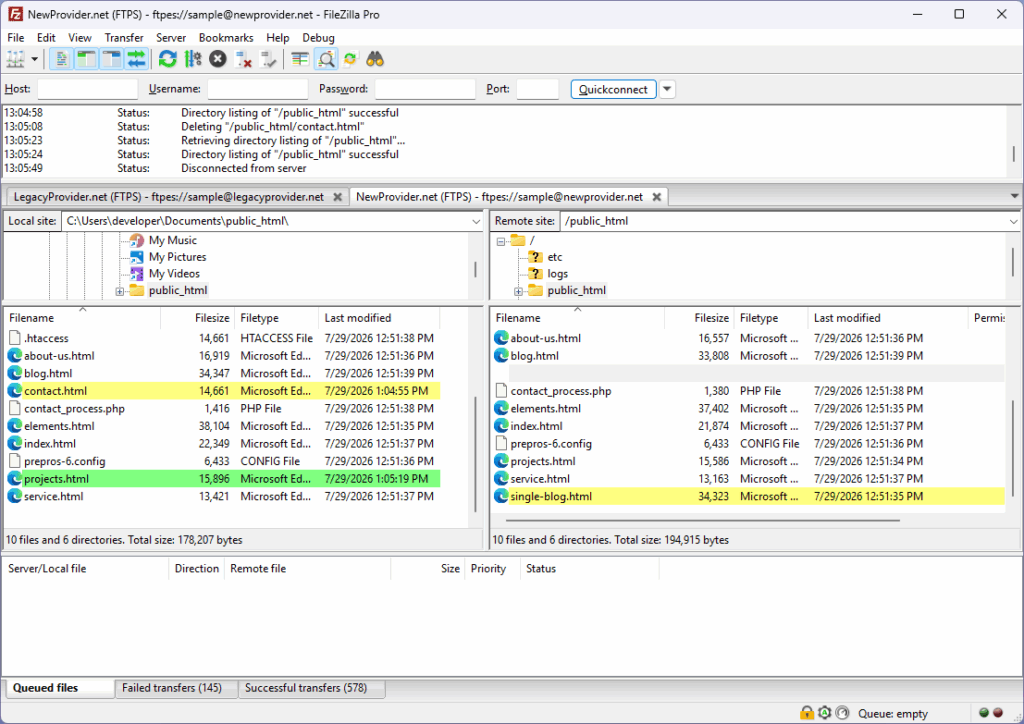
Once the upload finishes, don’t just assume it’s complete — verify it:
- Turn on Directory comparison between your local copy and the new host to see, file by file, anything that’s missing, older, or a different size than what you downloaded.
- For very large sites, File Synchronization can do this comparison and catch-up upload automatically instead of a manual pass.
Test before you point your domain
Most hosts give you a temporary URL or IP address you can use to load your new site before DNS is switched over — use it to click through your site and confirm pages, images, and (once the database is imported) logins all work. Only update your domain’s DNS once you’ve verified the new host on its temporary address. Keep the old host live and untouched until you’ve confirmed the new one is working, so there’s always a fallback while DNS propagates.
Setting up a new host, or managing several client sites that each need this same routine? See FileZilla Pro plans.