This feature is only available on FileZilla Pro, if you didn’t buy it yet you can buy FileZilla Pro from our Store.
Below you find a step by step guide, if you prefer you can watch our How to connect to Google Cloud Storage video tutorial.
Please follow the next steps to configure FileZilla Pro to connect to Google Cloud.
- In the menu bar, click on File › Site Manager…. See Using Site Manager for more details.
- Click on New Site.
- Select Google Cloud Storage from the Protocol drop down list.
- Enter your project ID in the Project ID field.
- Optionally enter an login as a hint for Google authentication.
- Click on Connect.
- Google mandates that you acknowledge reading FileZilla Pro’s statement regarding adherence to GoogleAPI Services User Data Policy.
- FileZilla Pro will open a Google Cloud authorization page in a browser window. This is a step required by
Google, to ensure that you permit FileZilla Pro to access your files on the cloud. If you’re not alread logged in to Google Cloud, you’ll need to login before you can authorize FileZilla Pro to access your files. - Return to FileZilla Pro.
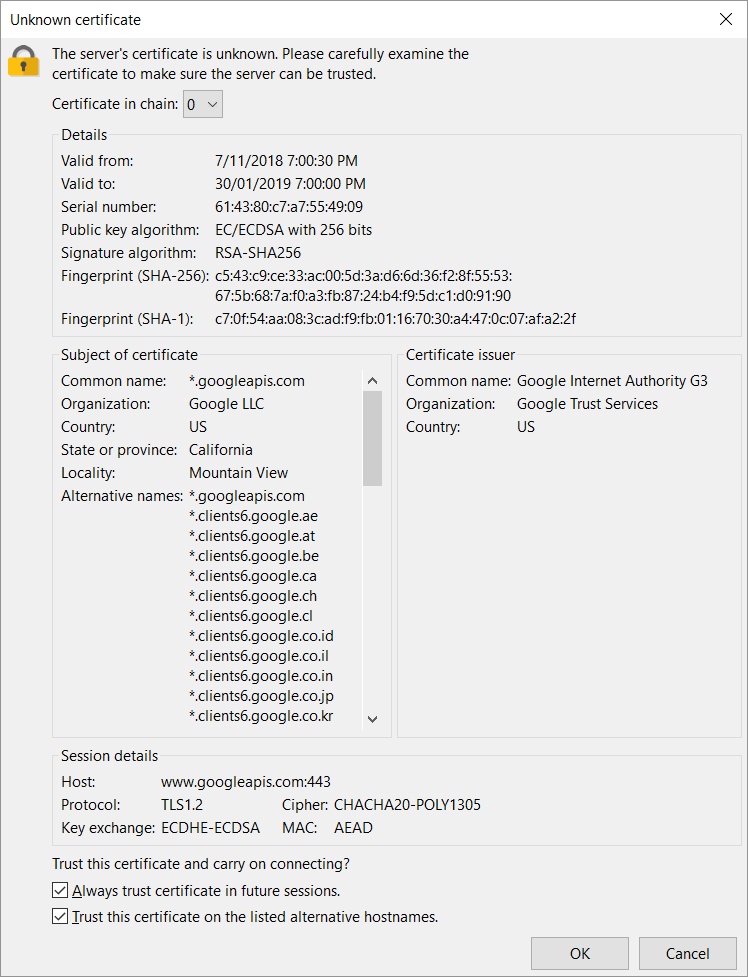
- Check the server certificate details displayed – Common name should include googleapis.com – and click on OK.
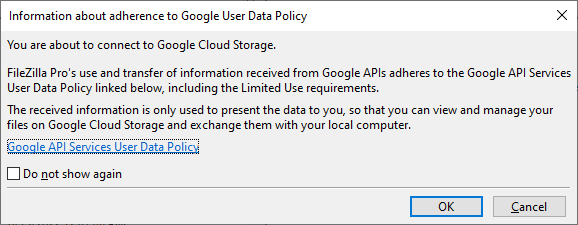
Click on OK to accept and select the Do not show again checkbox to prevent the same pop-up from appearing in the future.
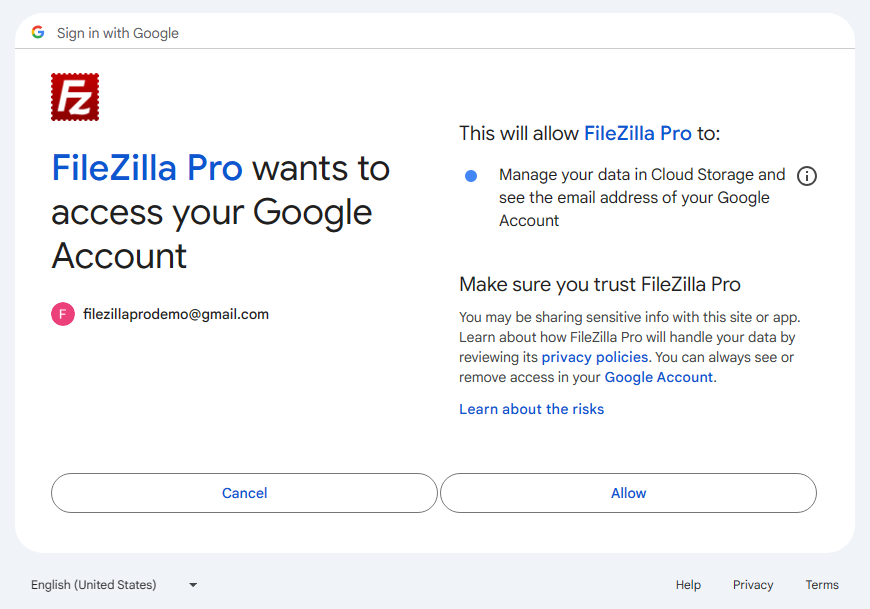
Check the option Manage your data in Cloud Storage and see the email address of your Google Account.
Click on Continue.
Your Google Cloud project directories and files will be displayed in the Remote directories section of the main window.
You can now transfer files between your local machine and your Google Cloud account.
Note: In order to avoid re-entering your password, save passwords protected by a master password (see Protect Passwords with a Master Password) and you’ll need to authenticate only once, as it will save the Google Cloud access token for future connections.
To connect FileZilla Pro to Google Cloud using a service account, please follow these steps:
- Open the Google Cloud console and navigate to the IAM & Admin section.
- Select Service Accounts from the menu.
- Click on the service account you want to use.
- Go to KEYS tab.
- Click on the ADD KEY button and select Create new key.
- Select the JSON type and click on the Createbutton.
- Save the generated key file in a secure location.
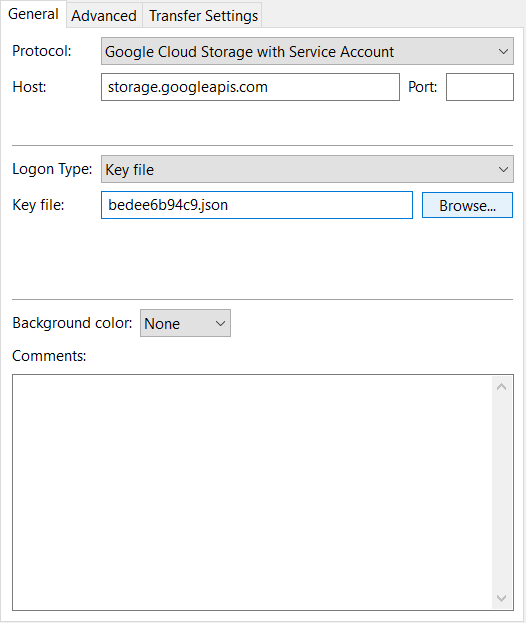
- Open FileZilla Pro and go to the Site Manager and create a new site entry.
- From the Protocol drop-down list, select Google Cloud Storage with Service Account.
- In the Key file field, enter the full path of the saved key file or click on the Browse button to locate and select the key file.
- Click Connect.
The video tutorial below shows how to connect to Google Cloud Storage with FileZilla Pro.
Video tutorial: How to connect to Google Cloud Storage
Related Topics: