To connect to an SFTP server follow the steps below:
- Open FileZilla Pro RemoteDrive: Launch the application or click on its icon if active.
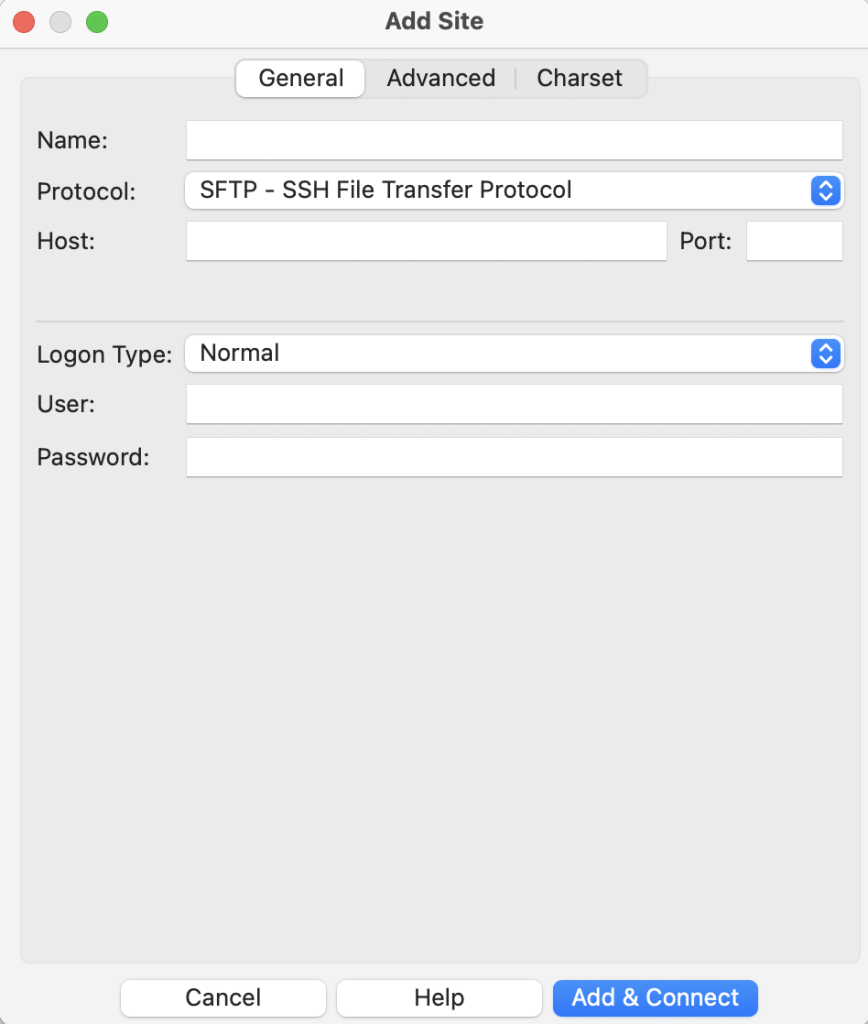
- Add a Server: Click on +Add server.
- Choose Connection Type: From the top-down menu select SFTP – SSH File Transfer Protocol
- Label Your Connection: In the “Name” field, enter a label for your connection.
- Configure Connection Details:
- Host: Enter either the IP address or the host name (e.g., ftp.example.com).
- Port: Specify the port number, usually 22.
- Choose the most appropriate logon type among the following:
- Normal: The most common option. You provide both your username and password upfront. The password is retained and you won’t need to re-enter it after restarting the program.
- Anonymous: Connects without requiring any authentication.
- Ask for password: You’ll be prompted for the password only once until you quit Remote Drive.
- Interactive: You enter your username, but the password is prompted each time you connect.
- Key File: Uses a private key file for authentication. The corresponding public key needs to be properly set on the server’s side.
- Account: Requires additional account info after username and password. Typically used when you need to pass additional parameters or enable an extra layer of authentication.
- Set Credentials Information:
- User: Enter your user ID.
- Password: If required by the Logon Type you choose, input your password.
Note: if the file is password-protect that password will be required only at logon time.
Complete Connection Setup: Click Add & Connect to establish the connection. - Complete Connection Setup: Click Add & Connect to establish the connection.
Related Topic:
The video tutorial below shows the process of setting up SFTP connections using FileZilla Pro RemoteDrive.