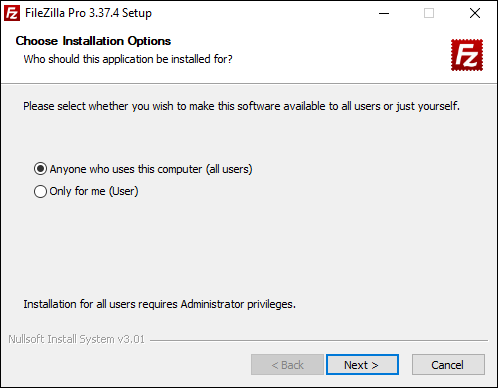
Note: You will require administrator privileges on the current computer if you want to install FileZilla for all users of the machine.
Installing FileZilla is slightly different on each operating system.
Ensure that you pay attention to where the download saves onto your local computer.
Read below our step by step guide on how to install, if you prefer you can watch our Installation video tutorial instead.
Prerequisites
Before installing, you’ll need:
- At least 50MB of space free on your drive.
- Administrator privileges if you want to make it available for all users on a Windows machine.
Windows installation
-
- Double-click on the FileZilla install file to begin the installation.
This file will be named FileZilla_Pro__-setup.exe: for example, FileZilla_Pro_3.37.0_win64-setup.exe.
- Double-click on the FileZilla install file to begin the installation.
-
- Select whether to install FileZilla for all users of the machine, or only the current
user.
- Select whether to install FileZilla for all users of the machine, or only the current
-
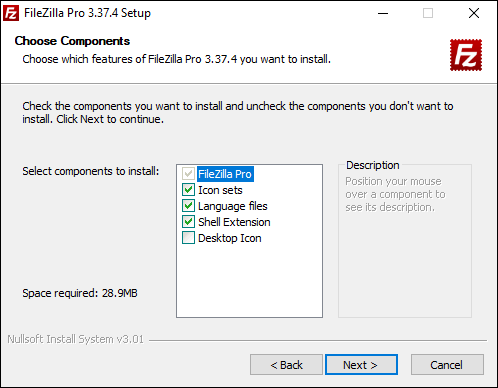
- Select the components that you want to be installed with FileZilla:
-
-
- FileZilla is the base program; this is required.
-
-
-
- Icon sets provide different looks.
-
-
-
- Language files allow you to run FileZilla in a language other than English.
-
-
-
- Shell extension allows you to drag and drop files from Windows Explorer
into FileZilla . - Desktop icon adds a link to FileZilla to your desktop, making it easy to find and run the program.
- Shell extension allows you to drag and drop files from Windows Explorer
-
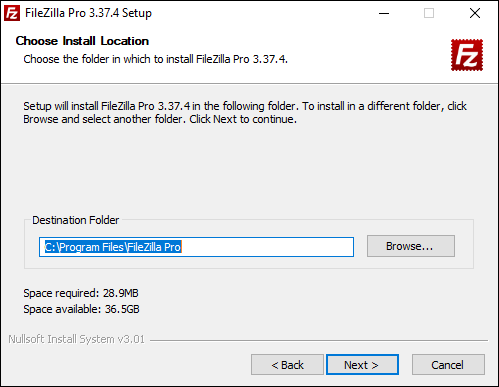
- Click OK to use the default install location or click Browse… and
navigate to your preferred directory, then click OK to move to the next window.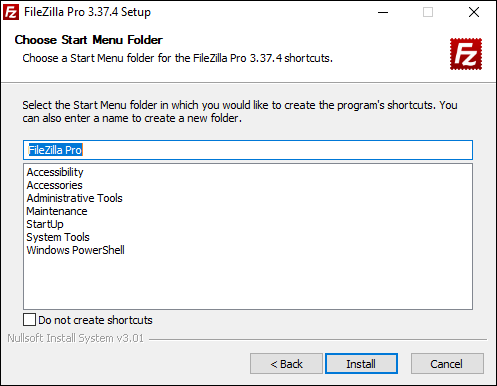
- Pick an existing Start Menu folder to add an icon for FileZilla, enter a new name to have the installer create new Start Menu folder, or click OK to create a separate FileZilla folder.
The video tutorial below shows how to install FileZilla on Windows.