Note: This feature is not available for FileZilla CLI.
What you’ll need:
- A B2 account
- A key ID
- An application key
Creating an application key
- Log into your Backblaze B2 account.
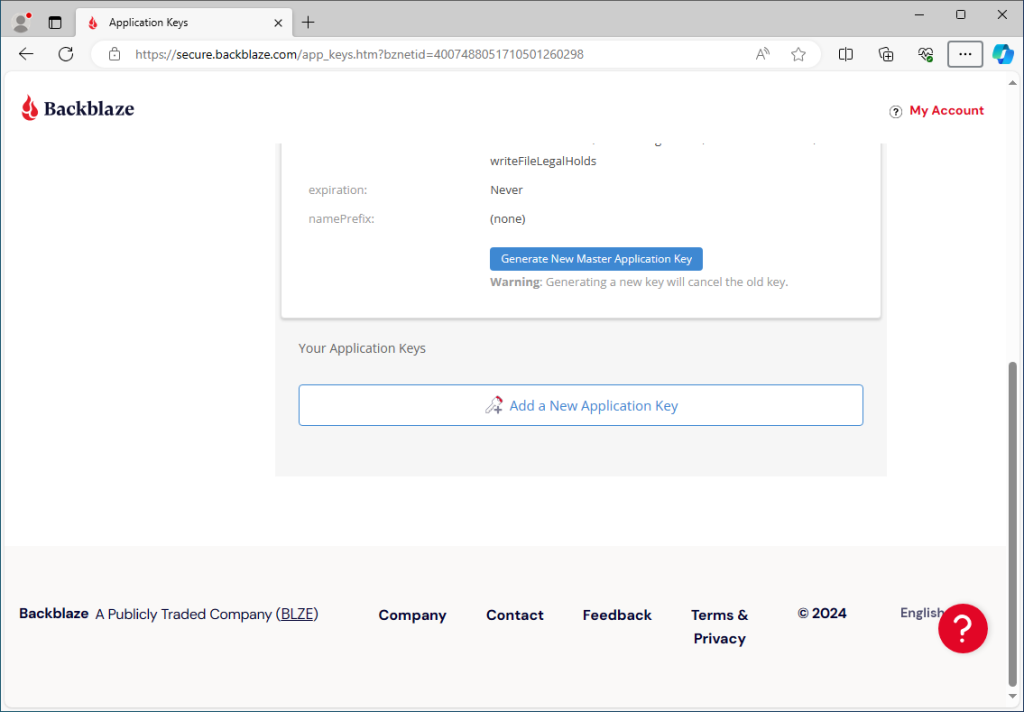
- Click on Application Keys in the left pane.
- Scroll down and click on Add a New Application Key.
- Enter a name, and select any restrictions that you need. FileZilla Pro Command Line will need to read and write permissions for at least one bucket.
- Click on Create Application Key.
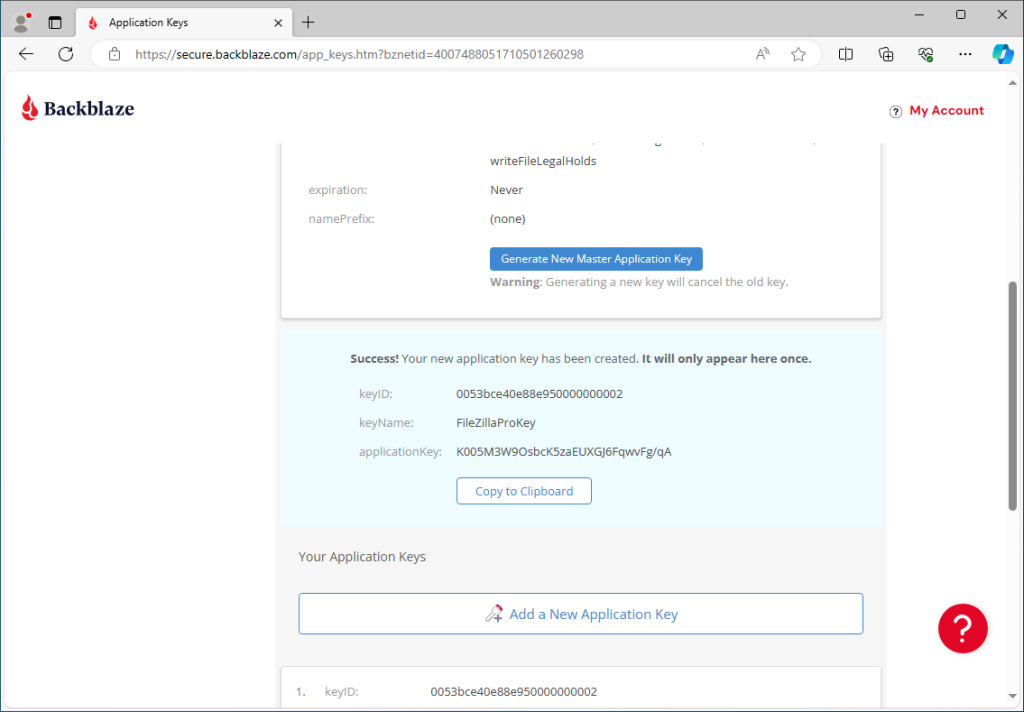
The Backblaze B2 website will create a new application key for FiZilla Pro Command Line to use. - You should see a Success! message. Save both the keyID and the applicationKey.

Connecting to B2
Use the b2 protocol and connect to the api.backblazeb2.com host:
-
From the prompt enter the
connect command:
connect b2://<application key ID>:<application key>@api.backblazeb2.

com<path>
Optionally you can use the parameters of the connect command:
connect --protocol b2 --user <application key ID> --pass <application key>

 --path <path> api.backblazeb2.com
Note that the path is optional but if present it has to start with a slash.
You can use either the master application key or a normal application key.
You can now transfer files between your local machine and your Backblaze B2 account.