Installing FileZilla Pro CLI is slightly different on each operating system.
When you buy FileZilla Pro CLI, you’ll receive a login (usually your email address) and code, as well as a download link. Click on the link, or copy and paste to your browser, and enter your login and code to start the download.
Note: Ensure that you pay attention to where the download saves onto your local computer.
Prerequisites
Before installing FileZilla Pro CLI, you’ll need:
- At least 20MB of space free on your drive.
- Administrator privileges if you want to make the program available for all users on a
Windows machine.
Check that the date and time on your machine are correct. FileZilla Pro CLI will not allow you to complete the registration process unless both date and time are set correctly. If in doubt, set your machine to automatically set its time and date.
Installation
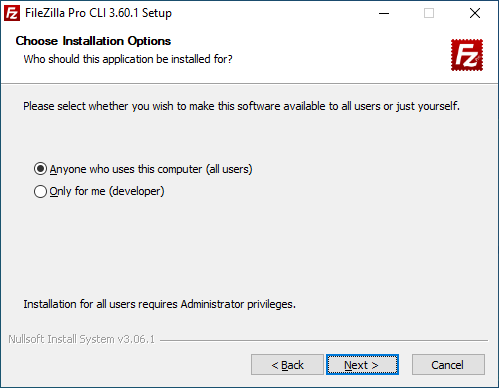
Note: You’ll require administrator privileges on the current computer if you want to install FileZilla Pro CLI for all users of the machine.
- Double-click on the FileZilla Pro CLI install file to start the installation.
This file will be named FileZilla_cli_<version number>_win64-setup.exe: for example,
FileZilla_cli_3.54.1_win64-setup.exe. - Select whether to install FileZilla Pro CLI for all users of the machine, or
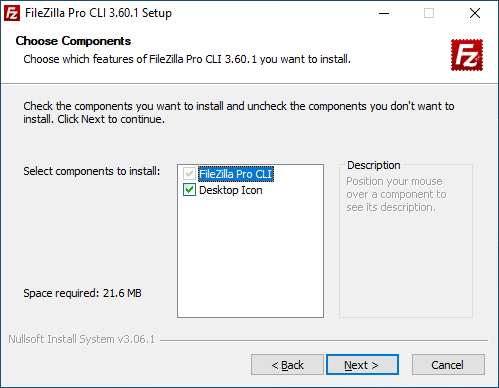
just the current user. - Select the components that you want to be installed with FileZilla Pro CLI:
- FileZilla Pro CLI is the base program; this is required.
- Desktop icon adds a link to FileZilla Pro CLI to your desktop, making
it easy to find and run the program.

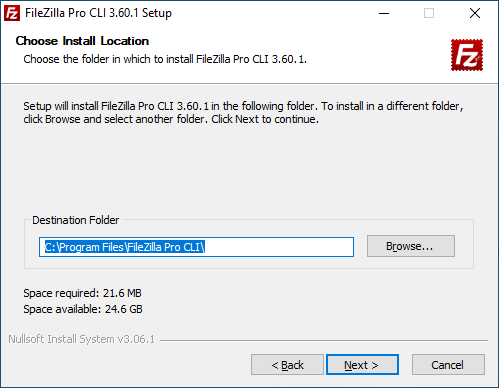
- Click Browse if you want to select an installation location. Click Next to move to the next page.
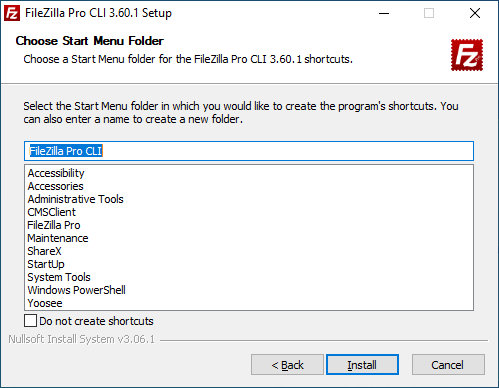
- Pick an existing Start Menu folder to add an icon for FileZilla Pro CLI, or
enter a new name to create a new Start Menu folder.
The video tutorial below shows how to install FileZilla Pro CLI.


