Below you find a step by step guide, if you prefer you can watch our How to Upload Files to Box video tutorial.
To connect to Box, make sure you have the following:
- A Box account
- Your usual login details for Box; a user ID (typically an email address) and password for the Box account
Note: If FileZilla Pro is configured to save passwords protected by a master password (see Protect Passwords with a Master Password), you’ll only need to authenticate it for use with Box once; it will save the access token for future connections.
Configuring FileZilla Pro for Box
Please follow the next steps to configure FileZilla Pro to connect to Box.
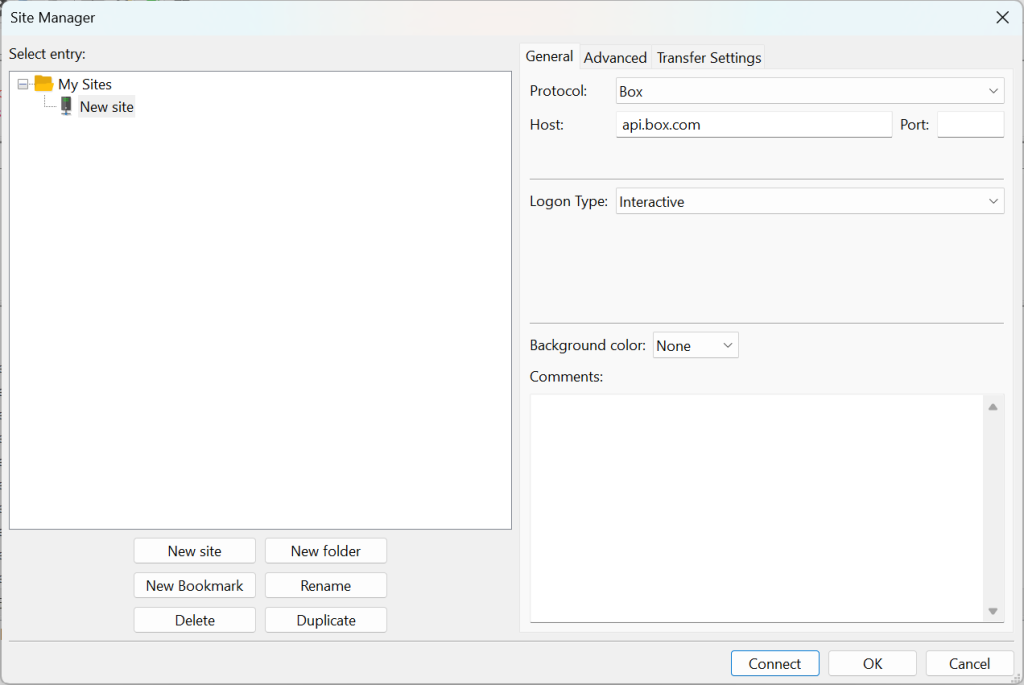
- In the menu bar, click on File › Site Manager…. See Using Site Manager for more details.
- Click on New Site.
- Select Box from the Protocol drop down list.
- Click on Connect.
- FileZilla Pro launches the default browser, then you need to authenticate and grant access.
- Box asks to grant access.
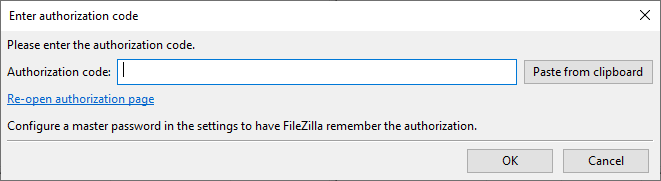
- An authorization code is generated
- Paste the code in the Authorization window or click the Paste from clipboard button.
- FileZilla Pro will check the server’s TLS certificate and display a window like this:
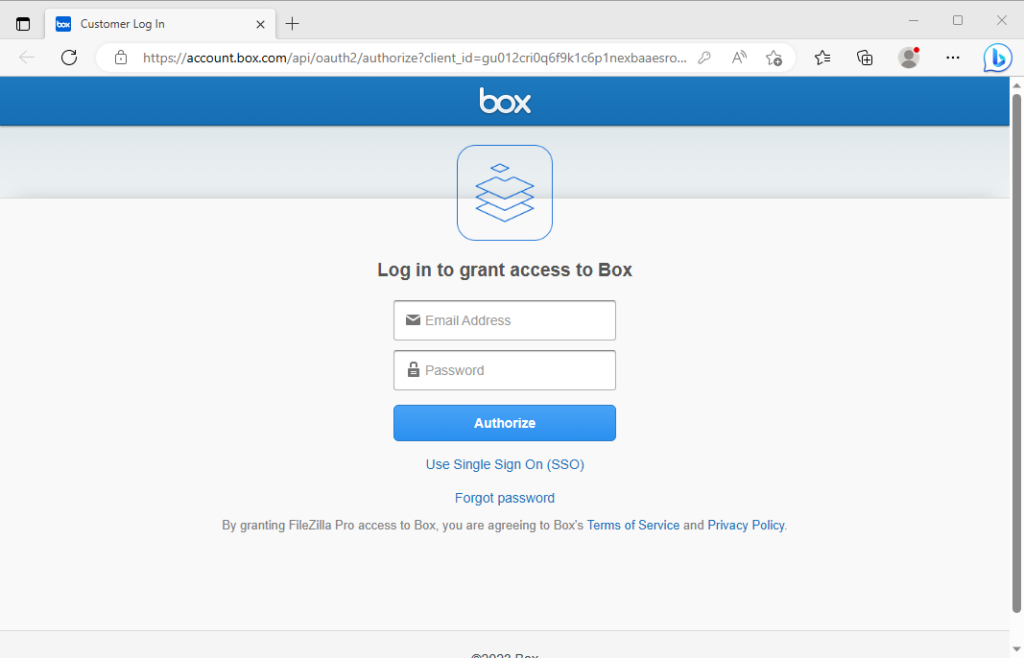
Enter your credentials and click Authorize.
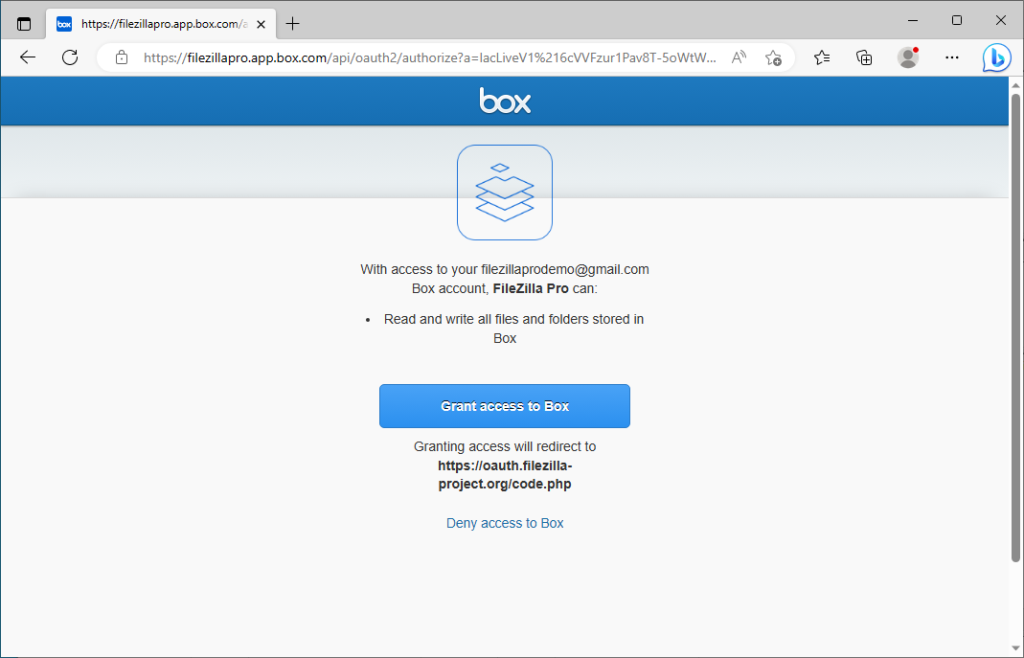
Click Grant access to Box.
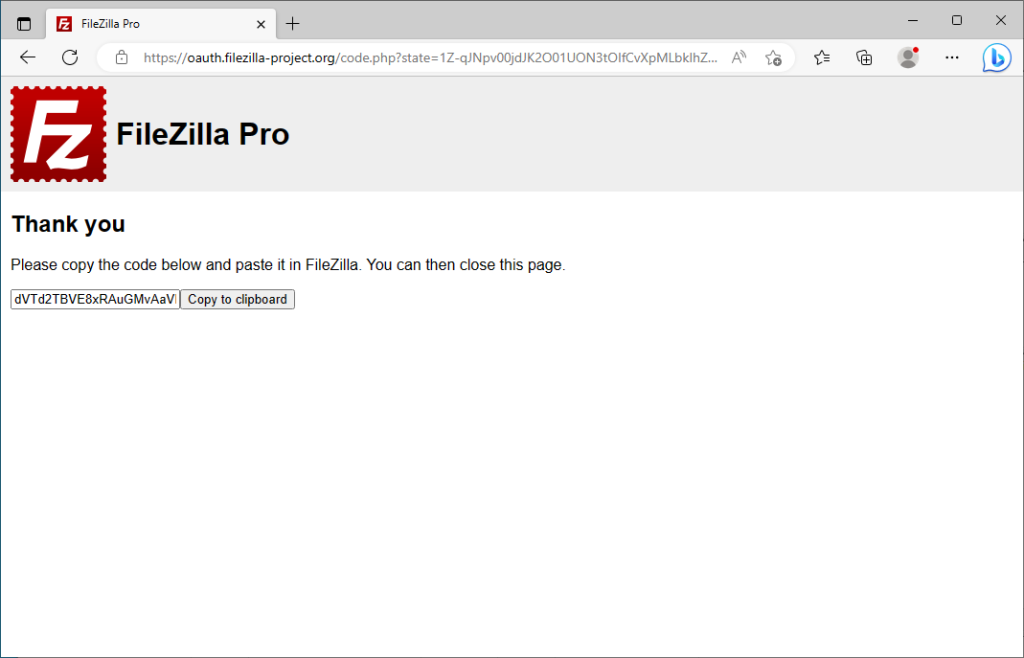
Copy the code to the clipboard or click the Copy to clipboard button.
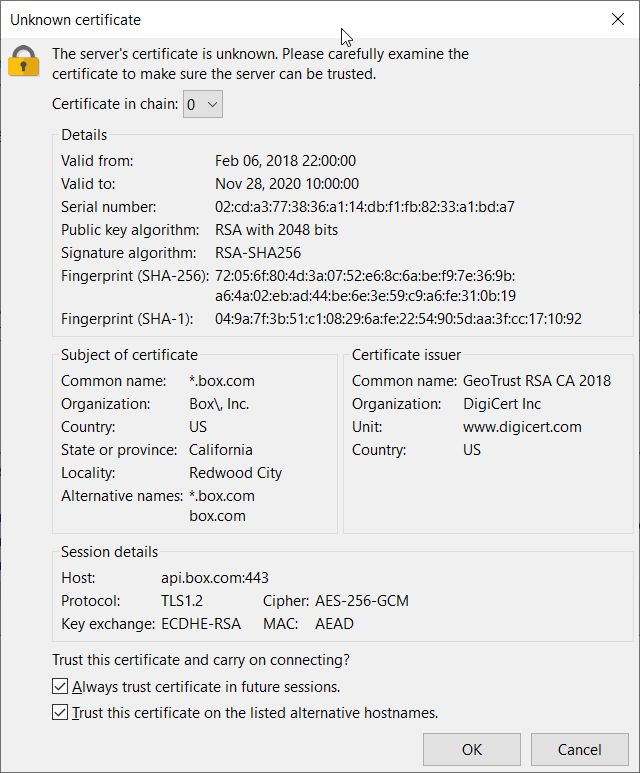
Check the server certificate details displayed – Organization should be Box, Inc.
Click on OK.
Your Box directories and files will be displayed in the Remote directories section of the main window.
You can now transfer files between your local machine and your Box.
The video tutorial below shows how to Connect to Box.
Box is just the start
FileZilla Pro connects to all major cloud storage providers from a single interface — no extra software, no credential juggling. Transfer files between your local machine and the cloud exactly as you would over FTP.