To install FileZilla Pro on macOS, download the installer from the FileZilla Pro download page, double-click to extract with Archive Utility, drag FileZilla Pro.app to your Applications folder, and launch it from Applications. Accept the macOS security prompt, enter your licence key, and you are ready to connect. Compatible with macOS Tahoe, Sequoia, Sonoma, Ventura, and Monterey — takes under two minutes.
Step 1 — Download FileZilla Pro
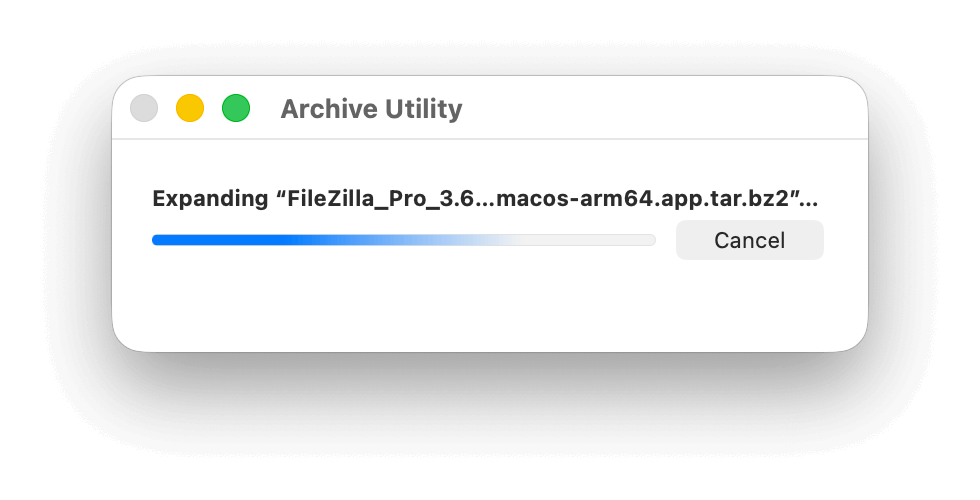
Go to the FileZilla Pro download page and download the macOS package for your architecture. The file will be named in the format FileZilla_Pro_<version>_macosx-<architecture>.app.tar.bz2 — for example, FileZilla_Pro_3.69.4_macosx-arm64.app.tar.bz2 for Apple Silicon.
If you are installing the free FileZilla client instead, the download is at filezilla-project.org. The installation steps below are identical.
Step 2 — Extract the archive
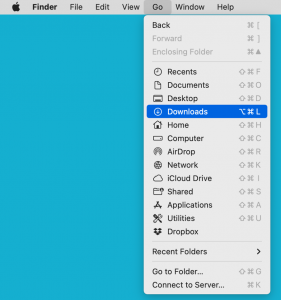
Open your Downloads folder in Finder (Go → Downloads, or ⌥⌘L). Double-click the .tar.bz2 file. macOS Archive Utility will extract it automatically and place FileZilla Pro.app in your Downloads folder.
Step 3 — Move FileZilla Pro to your Applications folder
Drag FileZilla Pro.app from Downloads into your Applications folder. To open Applications in Finder: Go → Applications (⇧⌘A). Drag the app across and drop it in.
Step 4 — Launch FileZilla Pro from Applications
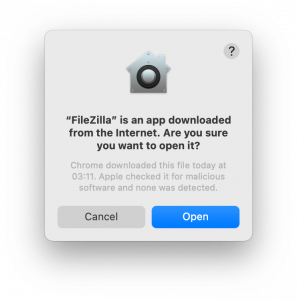
Open your Applications folder and double-click FileZilla Pro. macOS Gatekeeper will display a security warning the first time because the app was downloaded from outside the App Store.
Step 5 — Handle the macOS security prompt
If macOS shows “FileZilla Pro cannot be opened because it is from an unidentified developer” or similar:
- Quickest method: Right-click (or Control-click) FileZilla Pro.app in the Applications folder → Open → click Open in the confirmation dialog. You only need to do this once.
- Alternative: System Settings → Privacy & Security → scroll to the FileZilla Pro entry near the bottom → click Open Anyway.
FileZilla Pro downloaded from filezillapro.com is safe to open. The prompt appears because Apple charges a notarisation fee for third-party apps distributed outside the App Store.
Step 6 — Enter your FileZilla Pro licence key
On first launch, FileZilla Pro will prompt you to activate your license. Enter the licence key from your purchase confirmation email and click Activate.
If you purchased FileZilla Pro through the Mac App Store, skip this step — App Store purchases activate automatically. See the macOS App Store installation guide for the full flow.
Step 7 — (Optional) Pin FileZilla Pro to the Dock
To keep FileZilla Pro in your Dock for quick access: with FileZilla Pro running, right-click its Dock icon → Options → Keep in Dock.
macOS version notes
FileZilla Pro is compatible with macOS Tahoe (26), Sequoia (15), Sonoma (14), Ventura (13), and Monterey (12). On Sequoia and later, the Gatekeeper flow described in Step 5 applies — right-click → Open is the fastest resolution. If you are on an older macOS release, check the FileZilla Pro changelog for the last version that supports your OS.
Go further on macOS — mount your cloud storage directly in Finder
FileZilla Pro RemoteDrive is a macOS-exclusive extension that lets you browse Amazon S3, Microsoft OneDrive, Google Drive, Dropbox, Box, and other cloud services as native Finder locations — no transfer window, no separate app. Drag, drop, and manage files in the cloud exactly as you would on a local drive.