Below you find a step by step guide, if you prefer you can watch our How Do I Connect to a Server Using FileZilla/FileZilla Pro video tutorial.
First you need to connect to a remote server.
FileZilla/FileZilla Pro provides a number of different ways to connect to a remote server. You can:
- Use the QuickConnect bar (only to FTP, FTPS, SFTP, S3 connections and for all the other protocols use the Site Manager).
- Open the Site Manager and create a new site listing.
- Import a Transfer Queue from a previous session (see Import a Transfer Queue)
Connecting to a server via the QuickConnect bar
You can typically find the QuickConnect bar at the top of the main window, underneath the toolbar.
Note: Only the last 10 connections created via the QuickConnect bar will be saved for future use. To save a connection in the Site Manager once it’s made, see Save current connection to Site Manager in the next paragraph.
- Enter the address in the Host field.
- Enter your user ID for the connection in the Username field.
- Enter your password in the Password field.
- If required, enter a port number in the Port field.
- Click on Quickconnect.
If the connection requires FTP, you don’t need to include a protocol – just enter the address in IP (eg. 192.0.2.0) or in hostname format (eg. server.example.com) format. If the connection requires a different protocol, include it in the address –eg. ftps://192.0.2.0 or s3://server14.amazonaws.com.
Save current connection to Site Manager
If you connected to a remote server via the QuickConnect bar or by importing a previous Transfer Queue, you may want to save the connection details for future use.
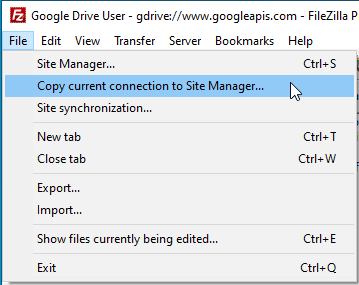
- In the menu bar, click on File > Copy current connection to Site Manager….
- Enter a name for the connection.
- Click on OK.
Connecting to a new FTP, SFTP, or FPTS server via the Site Manager
Before connecting to a remote server, you’ll need some connection information:
- The protocol that the server uses. This will often be FTP if you’re creating a standard website. See Protocols Supported by FileZilla and Protocols Supported by FileZilla Pro.
- The address of the server, and its port number if it uses a non-standard one.
- Your user ID for the server. This might be different to your usual login for the site.
Some servers won’t require a login, and will instead allow an anonymous connection
(typically for downloads). - If you have a user ID, your password for the server. Like your user ID, this might be different to your usual password for the site.
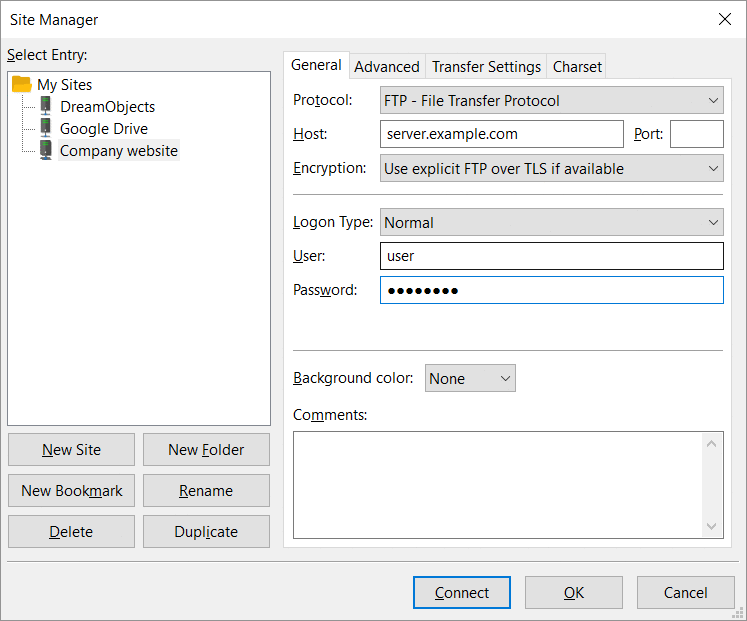
To connect to an FTP server:
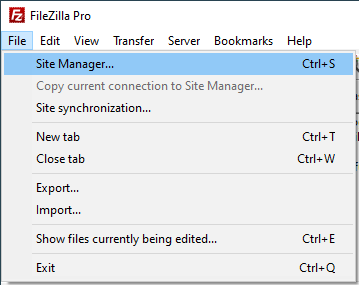
- In the menu bar, click on File > Site Manager….
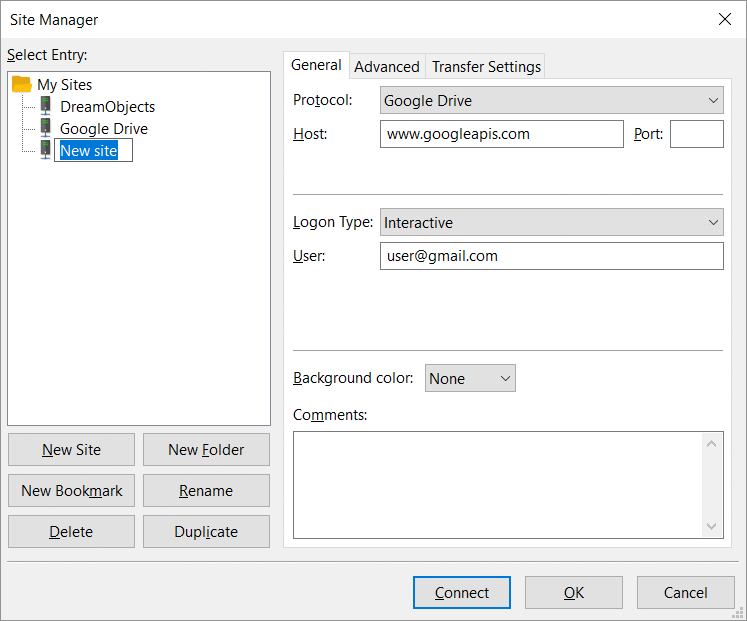
- Click on New Site.
- Enter a name for the new server. This is solely for display, so pick something that will remind you which server it represents.
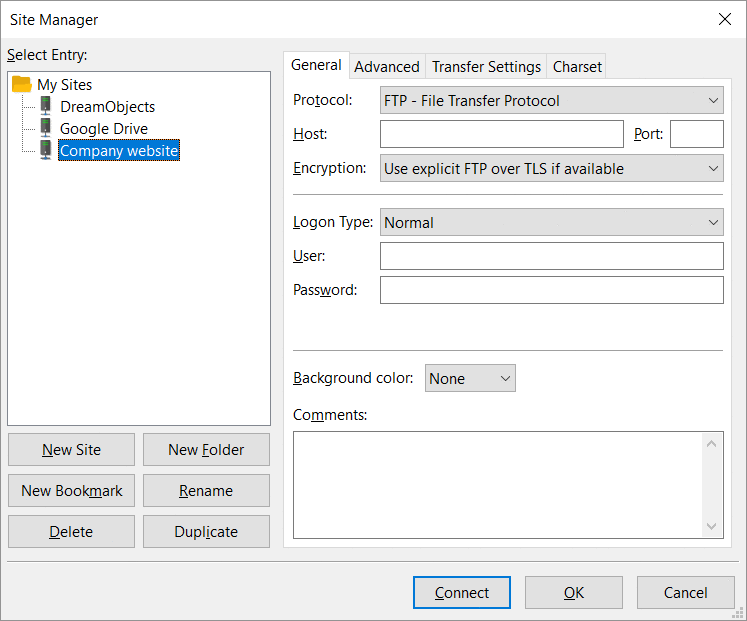
- Select a protocol from the Protocol drop down list. If the server uses FTPS, select FTP.
- Enter the address for the server in the Host field. This can be in IP address format
(eg. 192.0.2.0) or in hostname format (eg. server.example.com). - If required, enter a port number in the Port field.
- If the server requires FTPS, select Use explicit FTP over TLS if available from the Encryption drop down list. If the server does not support FTPS select Only use plain FTP (insecure). However with this option all the data, including the credentials, is transferred clear text.
- Select a login method from the Login Type drop down box, the options are:
- Normal: The most common option. You provide both your username and password upfront. The
password is retained and you won’t need to re-enter it after restarting the program. - Anonymous: Connects without requiring any authentication. • Ask for Password: You’ll be prompted for the password only once until you quit FileZilla Pro.
- Interactive: You enter your username, but the password is prompted each time you connect. • Key File: Uses a private key file for authentication. The corresponding public key needs to be properly set on the server’s side.
- If required, enter your user ID and password in the User and Password fields.
- Click on OK to save the server connection details, or Connect to save the server and connect to it.
Note: Please note that if you choose Normal or Account, you need to select either the Save passwords or Save passwords protected by a master password radio button in Edit› Settings › Interface › Passwords, otherwise FileZilla Pro will set it to Ask for Password.
The video tutorial below shows how to use Site Manager and how to organize the server connections.