This feature is only available on FileZilla Pro, if you didn’t buy it yet you can buy FileZilla Pro from our Store.
Below you find a step by step guide, if you prefer you can watch our How to Share Files with Microsoft OneDrive video tutorial.
To share a file or a directory you have to send a sharing invitation to the recipients.
To send the sharing invitation:
- Select the files and directories you want to share.
- Right-click and choose Share. The share window will be displayed with the existing permissions:
- Click the + button to add a share permission
- Enter one or more recipients’ emails
- Select the role:
edit – the recipient can edit
view – the recipient can only view - You can enter a custom email message, OneDrive will include it in the invitation email. The invitation email is sent when a new permission is added or when the role of an existing permission is modified.
- Check Requires sign-in to specify the recipient of the invitation is required to sign-in to access the shared item. OneDrive may return an error if the recipient is not an OneDrive user.
- If you want to remove an existing permission click the – button.
- You can change the existing permission grantee or role.
- Click OK to apply the changes to the permissions.
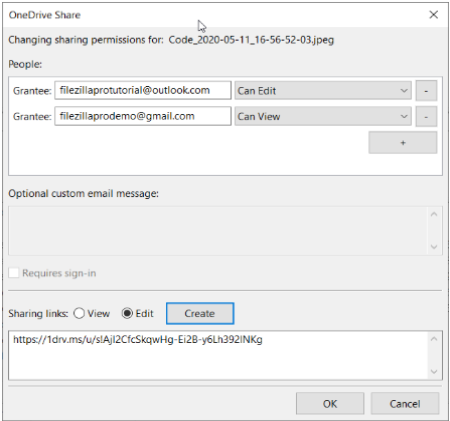
You can also create a sharing link for the selected items. Anyone with the link can either view or edit the item depending on the link type:
- Select the sharing link type:
- view: creates a read-only link to the item
- edit: creates a read-write link to the item
- Click Create. The links are shown in the list below.
The video tutorial below shows how to share files with Microsoft OneDrive.