Below you find a step by step guide, if you prefer you can watch our Log Files Configuration video tutorial.
To configure FileZilla/FileZilla Pro to save transfer messages to local log files:
- In the main menu, click on Edit > Settings….
- Select Logging from the menu on the left.
- If you want timestamps included in log files, tick the Show timestamps in message log checkbox.
- Tick the Log to file checkbox.
- Enter the file path and name, or click on Browse… and browse to the correct path, then click on Open.
- Tick the Limit the size of logfile checkbox.
- Enter a maximum size for each log file.
- Click on OK.
- Restart FileZilla/FileZilla Pro.
To save an existing log to a file:
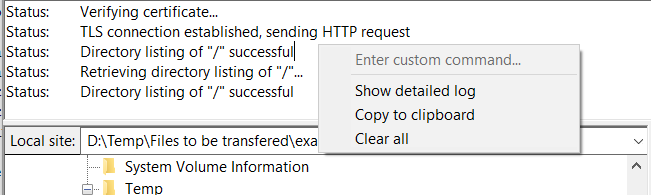
- In the main screen,right-click (Windows) or CTRL-click (MacOS) on the message log.
- Click on Copy to clipboard.
- Paste into a text editor and save file.
The video tutorial below shows how to enable logging with FileZilla and FileZilla Pro.
Video tutorial: Enable FileZilla Logging
Related Topics: