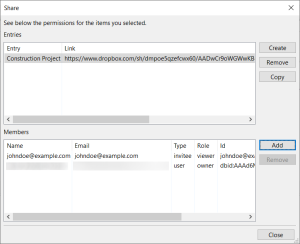
To share files and directories, you have two options: creating shared links and adding members.
Membership allows you to define access permissions to files and folders.
To share files and directories:
- Select the files and directories you want to share.
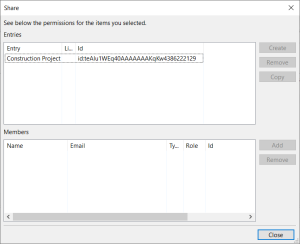
- Right-click and choose Share. This will open the share window.
- Select an entry in the list and click the Create button.
- The shared link window is displayed:
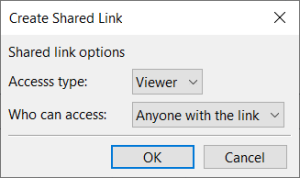
- Select the Access Type:
- Viewer: anyone with the link can view the file or directory.
- Editor: anyone with the link can edit the file or directory.
- In the Who can access choice box, select:
- Anyone with the link.
- Invited only: only invited members.
- Click Remove to delete a shared link; or
- Click Copy to copy the shared link to the clipboard.
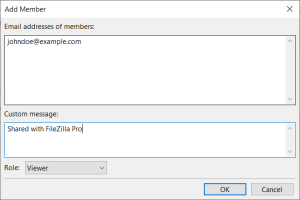
- Select one or more entries in the list.
- Clicks the Add button, this opens the Add Member window.
- Enter the email addresses of the member in the text box.
- You can enter a custom message and Dropbox will include it in the notification email.
- Use the Role option, to determine the level of access granted to the member. Dropbox personal accounts have no permission to grant Editor role.
- Click OK.
From the share window, you can proceed with the desired sharing method, whether it’s generating
shared links or adding members to the sharing.
To create a shared link:
Click OK and the created link will appear in the list.
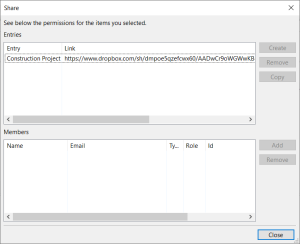
To manage shared links:
To add membership:
In the Share window, the members list shows the type and role of the membership.
The video tutorial below shows how to share files and directories on Dropbox using FileZilla Pro.