Installing FileZilla Pro Enterprise Server is slightly different on each operating system.
Note: Ensure that you pay attention to where the download saves onto your local computer.
Prerequisites
Before installing FileZilla Pro Enterprise Server, you’ll need:
- At least 25 MB of space free on your drive.
- Administrator privileges.
Windows Installation
Note: You’ll require administrator privileges on the current computer if you want to install FileZilla Pro Enterprise Server for all users of the machine.
- Double-click on the FileZilla Pro Enterprise Server install file to start the installation. This file will be named FileZilla_Server_<version number>_<win64 or win32>-setup.exe: for example,
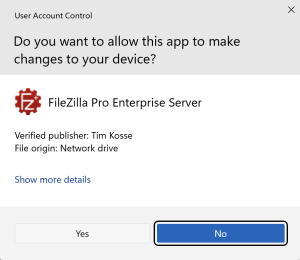
FileZilla_Server_1.1.0_win64-setup.exe - If you downloaded the program from FileZilla website confirm you are ok with the program to make changes to your device.
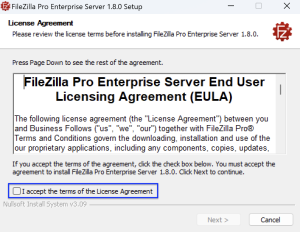
- Accept FileZilla Pro Enterprise Server license’s terms by selecting the appropriate checkbox
and then clicking on the Next button. - Select what you want to be installed:
- All will install both the Administration interface and the Server;
- Server will install only the Server;
- Administration interface will install only the Administration interface;
- Desktop icons adds a link to FileZilla Pro Enterprise Server to your desktop, making it easy to find and run the program. See Administration and Starting and Stopping FileZilla Pro Enterprise Server from the desktop or Start Menu;
- Start menu shortcuts will install shortcuts in start menu.
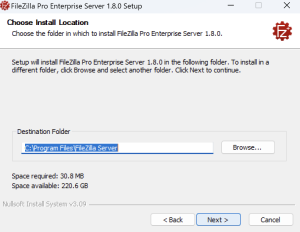
- Click Browse if you want to select an installation location. Click Next to move to the next page, the installation will happen in the proposed location.
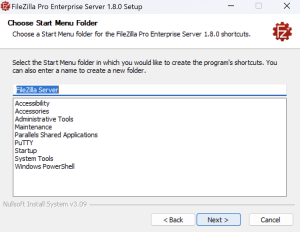
- Pick an existing Start Menu folder to add the icons for FileZilla Pro Enterprise Server, or enter a new name to create a new Start Menu folder.
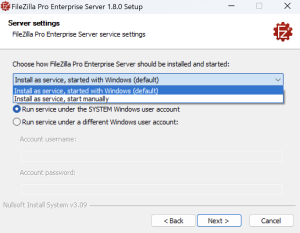
- FileZilla Pro Enterprise Server needs to be installed as a service on Windows (Windows Service). Select the launch option you prefer from the top-down menu, you can either get it started automatically (default) or manually.
- Open the Group Policy Editor.
- Navigate to Computer Configuration\Windows Settings\Security Settings\Local Policies\User
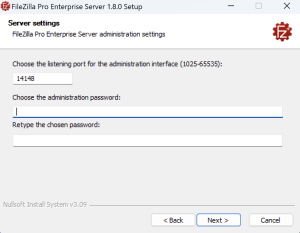
Rights Assignment. - Set the port on which FileZilla Pro Enterprise Server will listen to connections from the Administration interface.
- Choose your password and enter it in the password field, and then retype your password in the next field to confirm it. Passwords must meet the following security criteria:
- A minimum length of 12 characters.
- At least one numeral (0-9).
- At least one special character (e.g., !, @, #, $).
- At least one uppercase letter (A-Z).
- At least one lowercase letter (a-z).
If you do not choose a password a dialog window pops up warning you that passwords provide the first line of defense against unauthorized access to your computer and personal information. We strongly recommend that you do not leave it empty.
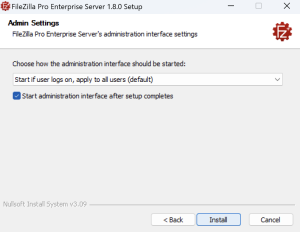
- Select if you want the Administration to start automatically for every user or only for the current user or manually. The Start administration interface after setup completes is set by default, if you want you can deselect it.
- The installation is complete, you can now start configuring FileZilla Pro Enterprise Server. FileZilla Pro
Enterprise Server has generated a TLS certificate for the server’s Administration interface, and it is now
ready for configuration.li>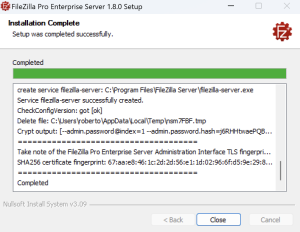
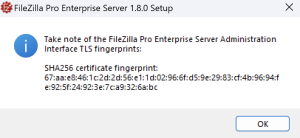
Note: You’ll be asked to take note of the fingerprint of the TLS certificate the server uses for administrative connections, so that you can double-check it later when you connect for the first time.
The video tutorial below shows how to install FileZilla Pro Enterprise Server.
Video tutorial: FileZilla Pro Enterprise Server Installation, Registration and Setup
Related Topics:
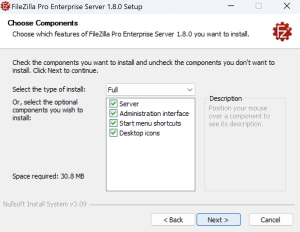
Note: You need to install at least one of them.
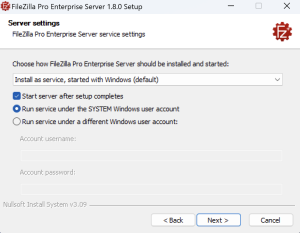
The checkbox Start server after setup completes is selected by default, if you want you can deselect it. The service runs under the local SYSTEM Windows account by default, if you want to run it under a different account you will be prompted to enter the username and password.
If you have previously installed FileZilla Pro Enterprise Server, the installer will present the option to keep the existing service settings. If you choose that option since you don’t need to set the port nor the password, as you have already set both before.
Note: If you wish to run FileZilla Pro Enterprise Server under a different account, ensure that the
account is included in the Replace a process level token user list. To verify this, follow these steps:
Skip the next two steps and go to select how you want the Administration to start.
Note: The FileZilla Pro Enterprise Server is made of two components: the server itself and the Administration Interface used to configure it.
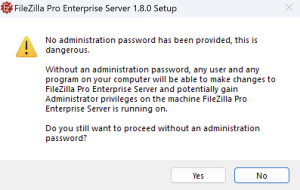
Note: if you don’t choose a password, anyone having can access the server. As a security measure, if a password is not set, only local connections are allowed by the Administrator server, i.e. you’ll be able to configure only a server responding on localhost (127.0.0.1).