This feature is only available on FileZilla Pro, if you didn’t buy it yet you can buy FileZilla Pro from our Store.
Below you find a step by step guide, if you prefer you can watch our How to Connect to WebDAV video tutorial.
What you’ll need to upload files to WebDAV:
- An account with a hosting service that provides WebDAV access.
- Connection information:
- host address
- host port
- user
- password
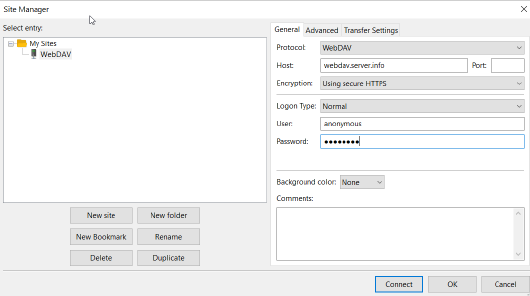
Configuring FileZilla Pro for WebDAV
- Open FileZilla Pro.
- In the menu bar, click on File > Site Manager….
- Click on New Site.
- Select WebDAV from the Protocol drop down list.
- Enter the host name in the Host field.
- If available enter the port in the Port field. If blank FileZilla Pro will use the default
port. - Select the encryption mode:
- Using secure HTTPS if the provider supports encrypted connections.
- Using insecure HTTP if not. Please be aware that credentials are transmitted in
clear-text over the net and that is insecure. - Enter the user name in the User field.
- Enter the password in the Password field.
- If the URL given to you by your provider includes a path, like provider.com/webdav,
enter the path (/webdav) in the Advanced Tab, Default Remote Directory field. Make
sure the path starts with a slash.
You can now transfer files between your local machine and your WebDAV provider.
The video tutorial below shows how to connect to a WebDAV storage with FileZilla Pro.