Below you find a step by step guide, if you prefer you can watch our How to connect to Rackspace Cloud Storage video tutorial.
These instructions also apply to any WebDAV provider.
What you’ll need:
- A Rackspace account
- Your Rackspace account number. The account number can be found in your
Rackspace profile page. - Your Rackspace login details: user ID and password
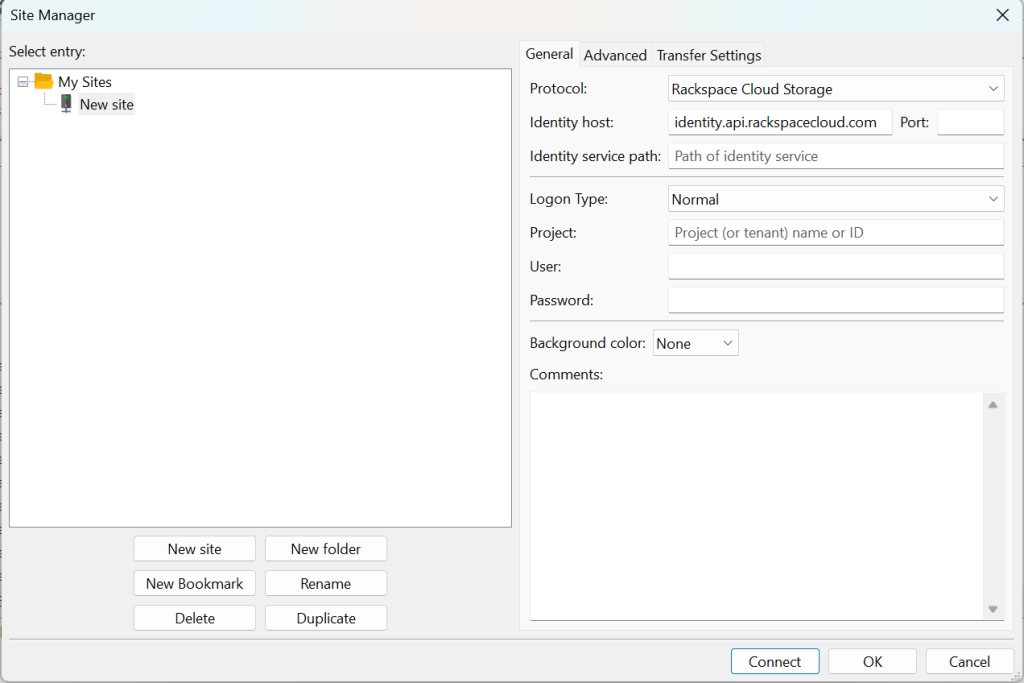
Configuring FileZilla Pro for Rackspace
- In the menu bar, click on File › Site Manager…. See Using Site Manager for more details.
- Click on New Site.
- Select Rackspace Cloud Storage from the Protocol drop down list.
- Enter /v2.0/tokens in the Identity service path field.
- Enter your account number in the Project field.
- Enter your user ID in the User field.
- Enter your password in the Password field.
- Click on Connect.
Your file storage buckets will be displayed in the Remote directories section of the FileZilla Pro window.
The video tutorial below shows how to connect to Rackspace Cloud Storage with FileZilla Pro.
FileZilla Pro
Rackspace is just the start
FileZilla Pro connects to all major cloud storage providers from a single interface — no extra software, no credential juggling. Transfer files between your local machine and the cloud exactly as you would over FTP.
Amazon S3
Google Drive
Microsoft Azure
WebDAV
Dropbox
OneDrive