This feature is only available on FileZilla Pro, if you didn’t buy it yet you can buy FileZilla Pro from our Store.
Each S3 bucket and file has an associated Access Control List (ACL) with grantees and permissions.
A canned ACL is a predefined set of grantees and permissions that can be set when creating a bucket or file.
Below you find a step by step guide, if you prefer you can watch our Managing Amazon S3 Canned ACL video tutorial.
To configure FileZilla Pro to use a canned ACL when creating buckets and files:
- Connect to your S3 site.
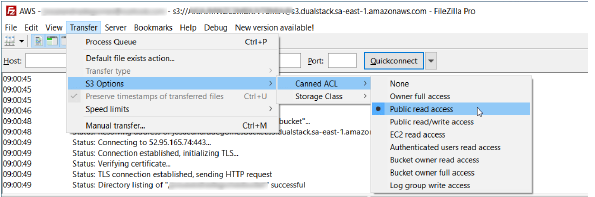
- In the main menu choose Transfer > S3 Options > Canned ACL:
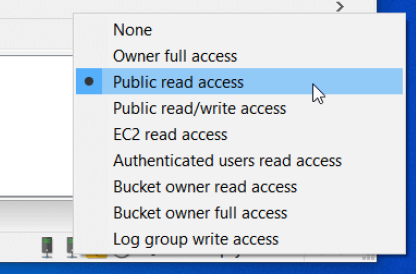
- None: no canned ACL is used. The S3 provider will use a default ACL for
the bucket or object. - Owner full access: owner gets full access; no one else has access rights.
- Public read access: owner gets full access; anyone gets read access rights.
- Public read/write access: owner gets full access; anyone gets read and
write access rights. - EC2 read access: owner gets full access; Amazon EC2 gets read access
rights. - Authenticated users read access: owner gets full access; any AWS account
gets read access rights. - Bucket owner read access: owner gets full access; bucket owner gets read
access rights. - Bucket owner full control: both owner and bucket owner get full access.
- Log group write access: Amazon log group gets write access.
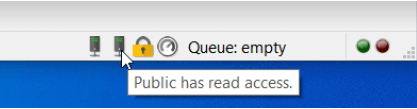
- The chosen canned ACL is shown in the status bar:
- Click the status bar canned ACL icon to select the canned ACL:
The options are:
Files added to the queue for upload include the currently selected canned ACL option which
will be set when the file is processed. Buckets created during the queue processing use the
currently selected canned ACL.
The video tutorial below shows how to configure FileZilla Pro to use Canned ACL with Amazon S3.